 Pin it
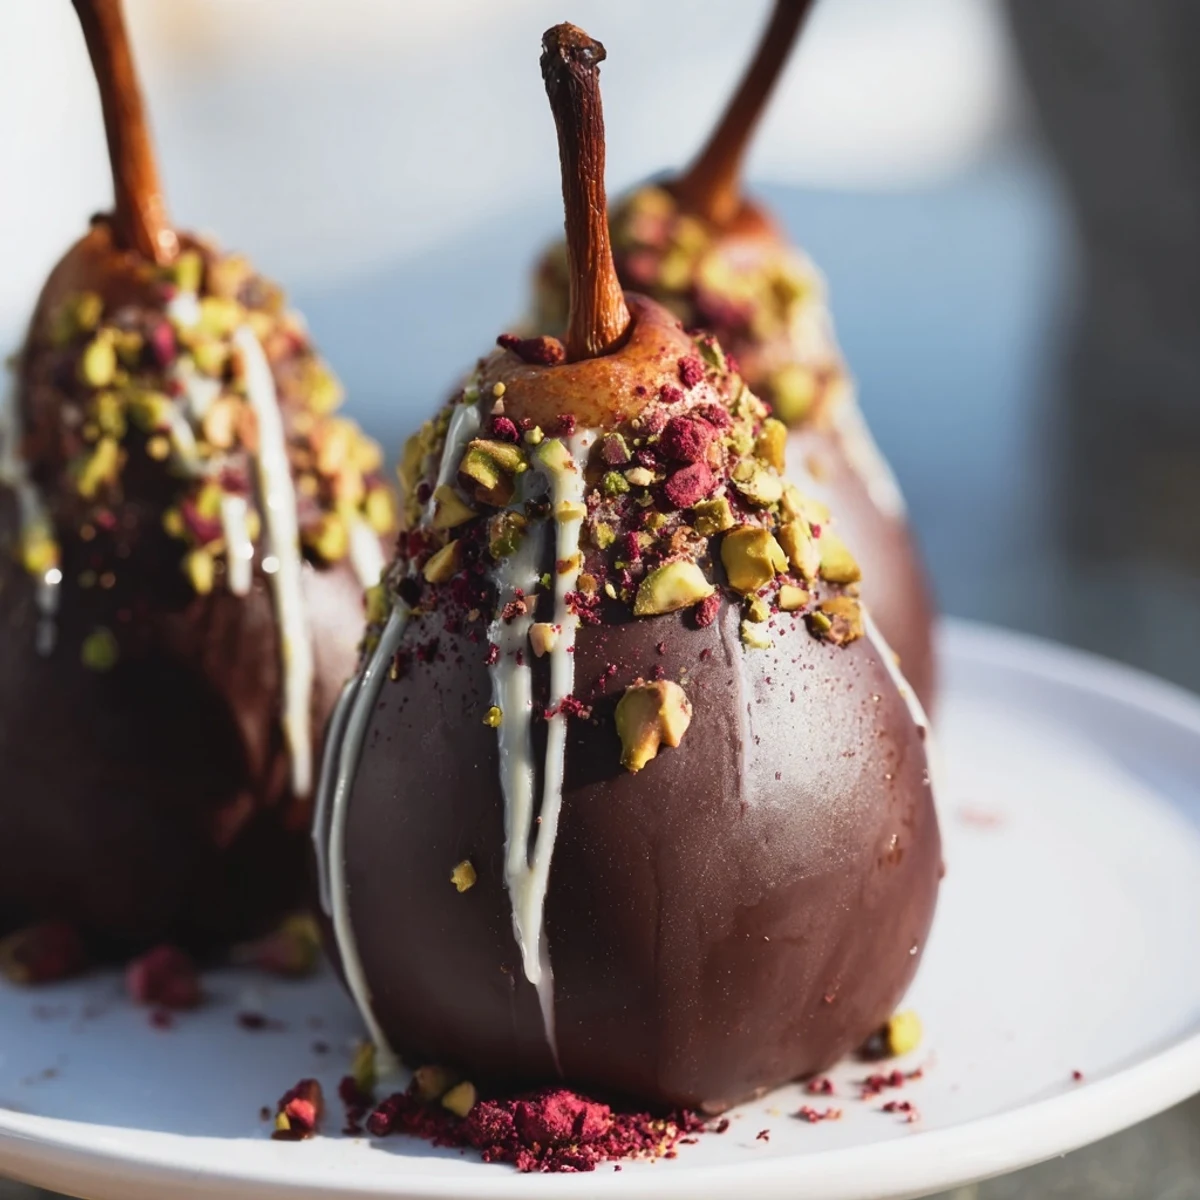
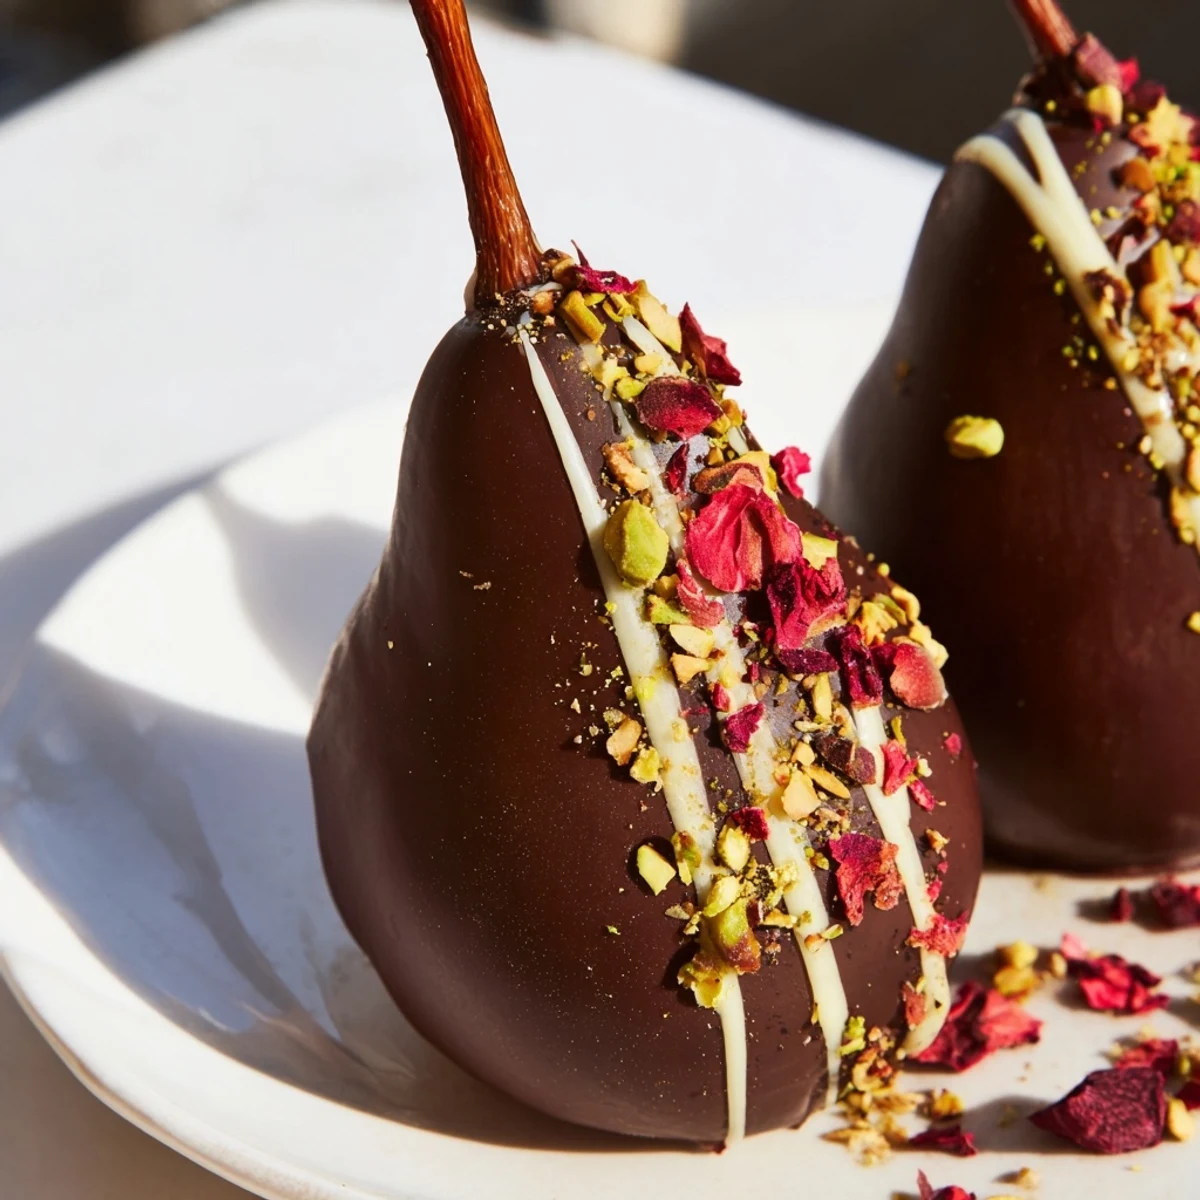
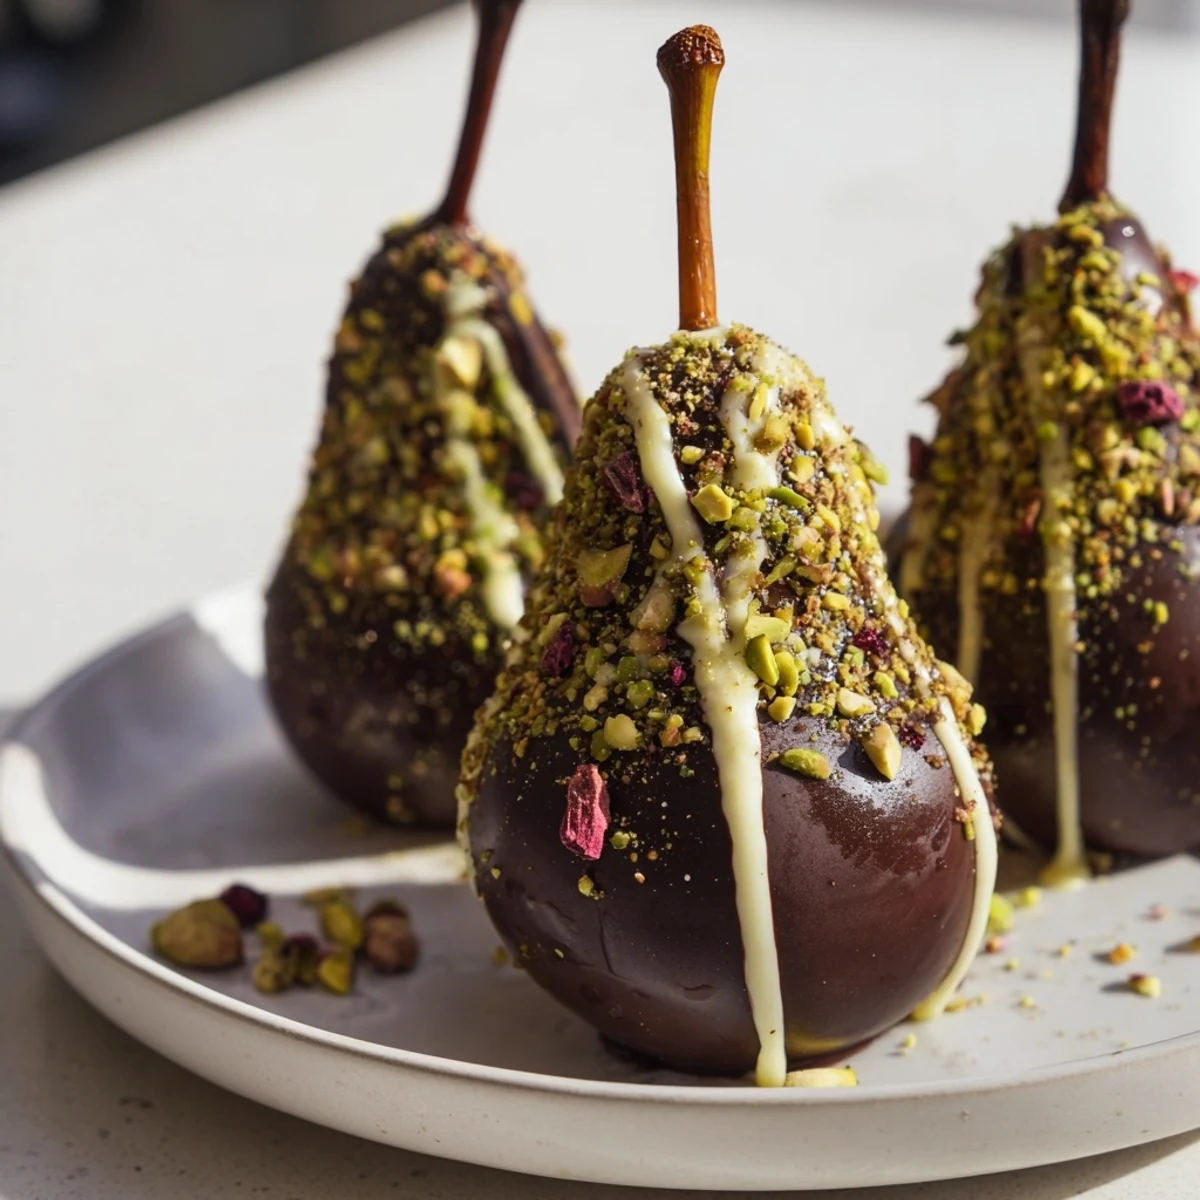
 This elegant dessert features ripe pears dipped in rich dark chocolate, enhanced with a touch of butter for smoothness. Coated pears are garnished with toasted nuts or edible petals, then chilled to set a glossy finish. The combination of fresh fruit and decadent chocolate creates a perfect balance of flavors and textures, ideal for sharing and celebration. Simple techniques and quality ingredients ensure an impressive yet easy-to-prepare treat.
The first time I made chocolate covered pears was actually an accident. I had planned to make chocolate strawberries for a dinner party but forgot to buy them. The pears in my fruit bowl were perfectly ripe and I thought, why not see what happens? My guests were so delighted by the unexpected combination of juicy, floral pear and bittersweet chocolate that it became my go to fancy dessert when I want to impress without spending hours in the kitchen.
I served these at my anniversary dinner last fall. The candlelight hit the glossy chocolate coating just right and we ended up feeding each other bites like we were teenagers again. There is something about holding a whole chocolate dipped pear by its stem that feels playful and intimate, much more than slicing into a regular dessert.
Ingredients
- 4 ripe but firm pears: Bosc or Anjou varieties work beautifully because they hold their shape while still being tender and sweet, and the natural pear flavor really shines through the rich chocolate
- 200 g high quality dark chocolate: The 70% cocoa percentage gives you that sophisticated slight bitterness that balances perfectly with the pears natural sweetness
- 1 tbsp unsalted butter: This tiny amount makes the chocolate coating silkier and helps it set with a gorgeous glossy finish
- 2 tbsp chopped toasted pistachios or hazelnuts: The crunch adds such a lovely texture contrast and the green pistachios look stunning against the dark chocolate
- 2 tbsp freeze dried raspberries or edible rose petals: These add little bursts of tartness and make the pears look like something from a fancy patisserie window
- 1 tbsp white chocolate melted: The drizzle is purely for that swoon worthy decorative effect that makes people gasp when you bring out the platter
Instructions
- Get your station ready:
- Line a baking sheet with parchment paper and have all your garnishes within reach because once you start dipping, everything moves fast and you want the chocolate to still be sticky when adding toppings.
- Prep the pears beautifully:
- Peel each pear carefully while leaving the stem intact, and trim a thin slice from the bottom so they stand upright on your serving plate like elegant little chocolate sculptures.
- Melt the chocolate until silky:
- Set up a double boiler with a heatproof bowl over simmering water, stir the chocolate and butter together until completely smooth and glossy, then remove from heat immediately so it does not seize up.
- Dip and decorate with confidence:
- Hold each pear by the stem and dip it two thirds of the way into the chocolate, let the excess drip off for a moment, then quickly sprinkle your garnishes over the soft chocolate before it sets.
- Add the finishing touches:
- Drizzle white chocolate back and forth over each pear using a spoon, then chill everything for 15 to 20 minutes until the chocolate is firm and ready to serve.
 Pin it
 My mother asked me to make these for her garden party last summer and I was nervous about transporting them. I packed them carefully in a single layer with wax paper between each one and not a single one got damaged. Seeing them arranged on a vintage silver platter among the flowers made me realize how something so simple can feel so extraordinary.
Making Ahead
You can dip the pears up to a day in advance and store them in the refrigerator. Just let them come to room temperature for about 15 minutes before serving so the chocolate is not rock hard and the pear flavor is more pronounced.
Chocolate Tips
I have learned that getting even a single drop of water into your melting chocolate will turn it into a grainy, separated mess. Make absolutely sure your bowl and utensils are completely dry before you start, and never let the water touch the bottom of your bowl when using the double boiler method.
Serving Ideas
These pears are stunning on their own but become even more special with thoughtful presentation. I like to arrange them on a wooden board with some cheese and crackers, or serve them alongside a glass of dessert wine for a really elegant ending to a meal.
- Try adding a pinch of sea salt or cinnamon to the melted chocolate for a sophisticated flavor twist
- Wrap the stems with little ribbons or twine if you are giving these as gifts
- Set up a DIY pear dipping bar at your next party and let guests create their own combinations
 Pin it
 There is something about the way juice and chocolate come together that feels like a small luxury in everyday life. I hope these pears bring as much joy to your table as they have to mine.
Common Recipe Questions
- → What type of pears work best?
-
Firm, ripe pears like Bosc or Anjou are ideal as they hold their shape well during dipping and chilling.
- → How do I melt the chocolate properly?
-
Melt chocolate gently over simmering water using a double boiler to avoid burning and ensure smooth consistency.
- → Can I substitute the nuts?
-
Yes, you can use toasted pistachios, hazelnuts, or skip nuts altogether and opt for freeze-dried raspberries or edible petals.
- → How long should the chocolate coating set?
-
Chill pears for 15–20 minutes in the refrigerator until the chocolate hardens to a firm, glossy finish.
- → Are there any flavor enhancements recommended?
-
A pinch of sea salt in the chocolate or a splash of pear liqueur before dipping adds depth and complexity to the flavor.