 Pin it
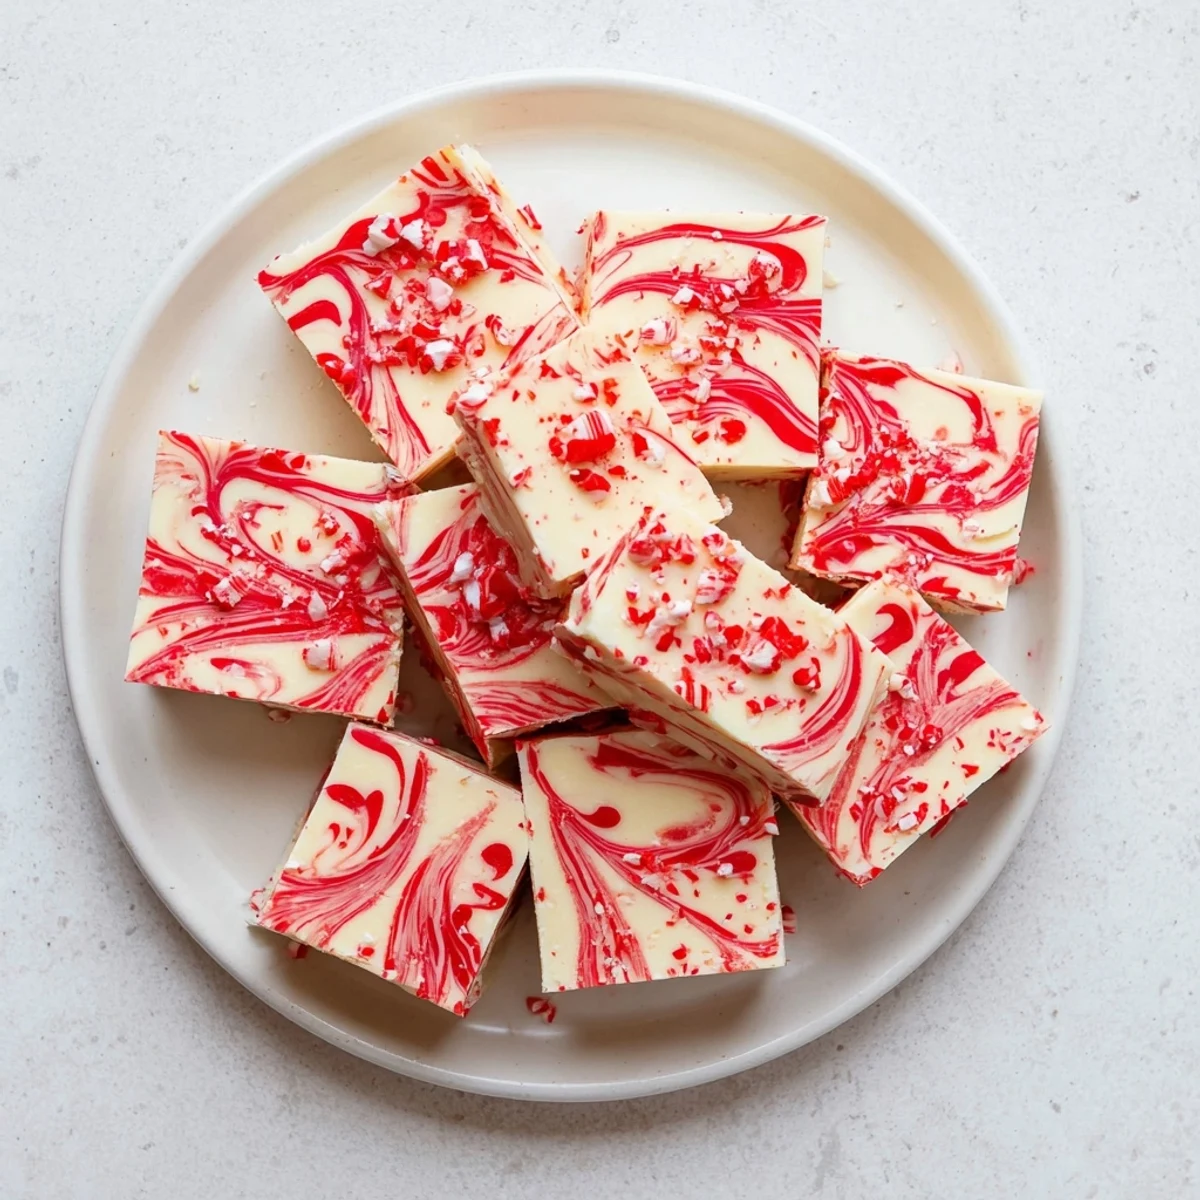
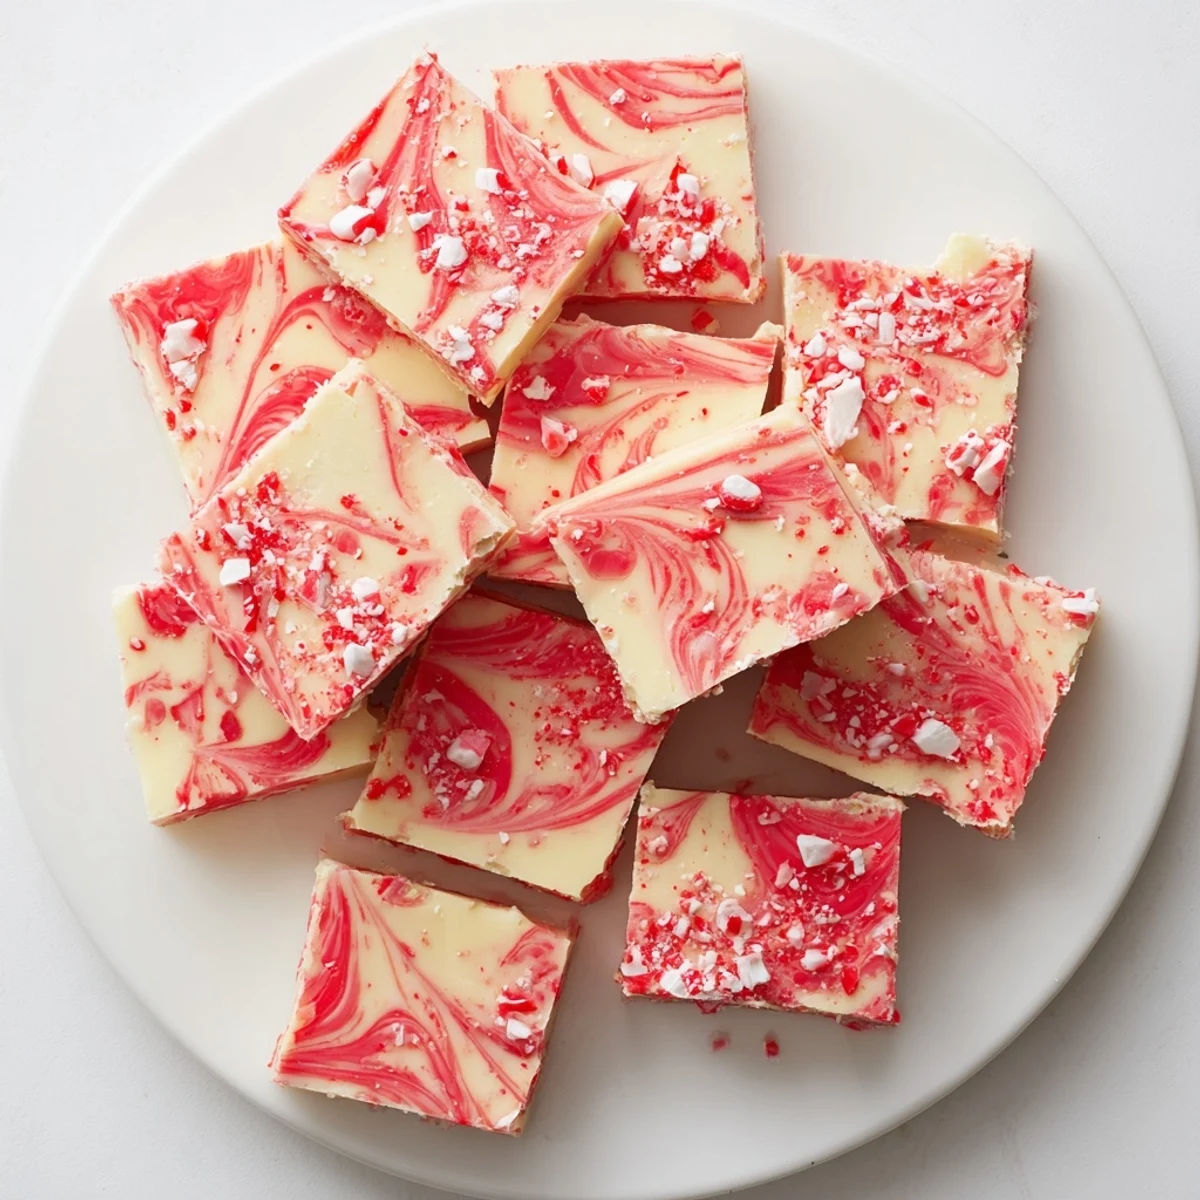
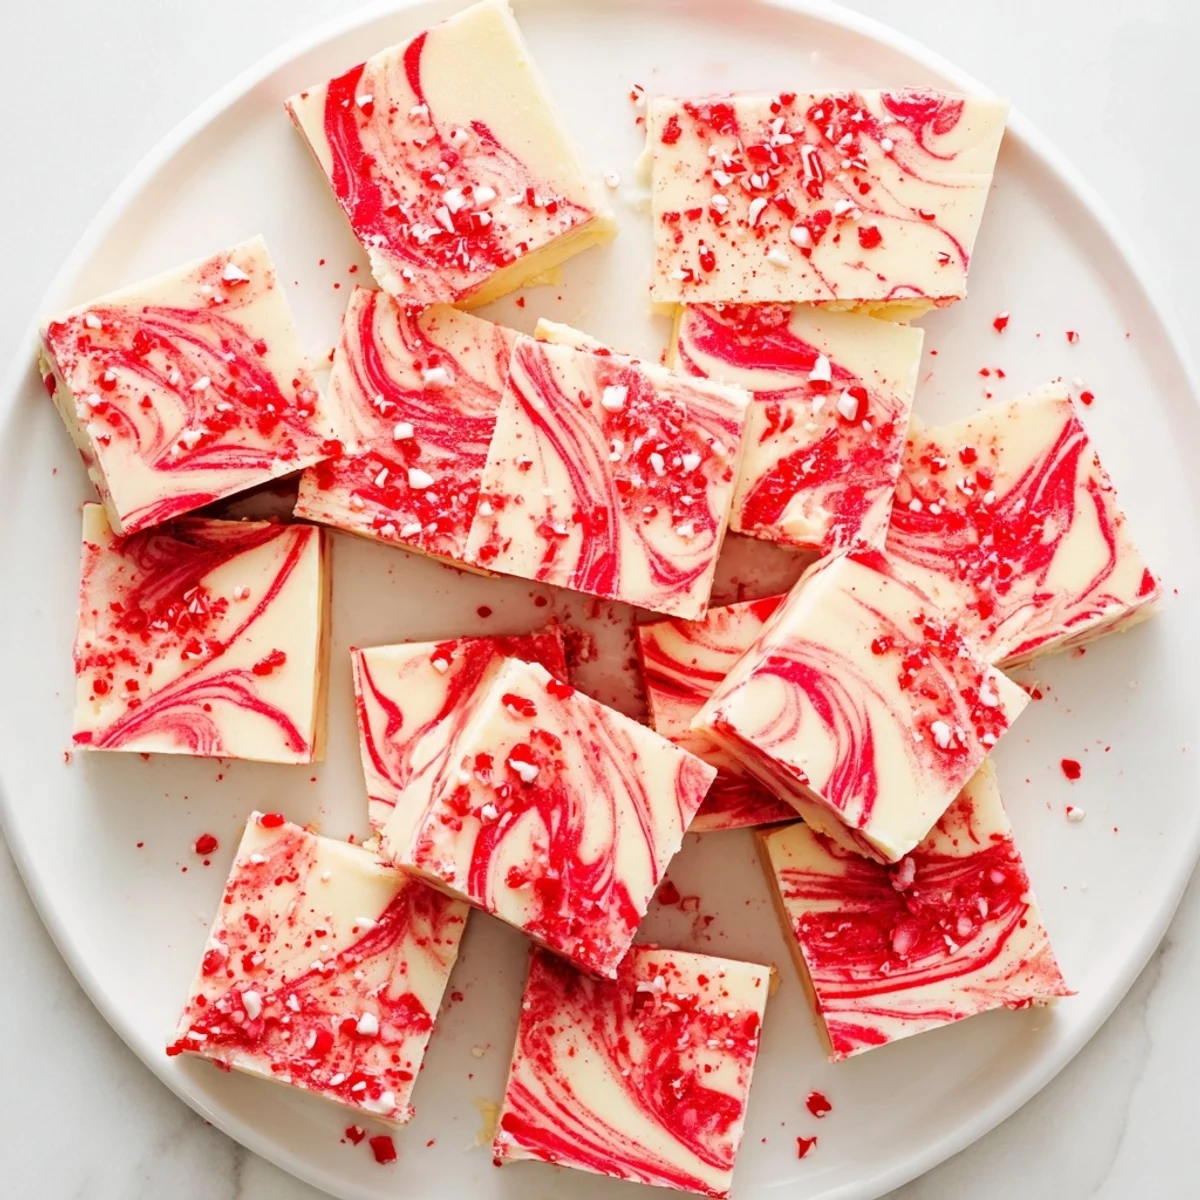
 This indulgent treat combines smooth white chocolate with sweetened condensed milk and butter for an irresistibly creamy base. A splash of peppermint extract adds refreshing minty flavor, while red gel coloring creates beautiful swirls throughout. Topped with crunchy crushed candy canes, each piece delivers the perfect balance of smooth, minty sweetness. Ready in just 25 minutes of active time, this festive confection needs 2 hours to chill before cutting into rich squares that are ideal for holiday platters, cookie exchanges, or gifting.
The kitchen still smelled like peppermint weeks after I first attempted this fudge. I'd been watching my grandmother make holiday candies for years, but somehow hers never looked like the nervous experiment I created. Standing there with red stained fingers and a swirl pattern that looked more like a accident than art, I almost scrapped the whole batch. Then my roommate walked in, broke off a corner, and promptly declared it the best thing I'd ever made.
Last December I made six batches of this fudge for different gatherings. The first was for my office potluck where it vanished in under ten minutes. The third batch I almost ruined by adding too much food coloring, turning the swirl an alarming shade of pink. By the sixth batch I'd learned that less color creates that elegant marble effect people cant stop talking about. Now my coworkers start asking about it in November.
Ingredients
- White chocolate chips: The quality here really matters since white chocolate is the star of the show. Good chips melt more smoothly and create that luxurious creamy texture.
- Sweetened condensed milk: This is what gives the fudge its perfectly smooth consistency. One can creates exactly the right amount of sweetness without being cloying.
- Unsalted butter: Two tablespoons adds just enough richness without making the fudge too soft. Salted butter would compete with the peppermint flavor.
- Peppermint extract: Half a teaspoon gives a refreshing mint taste without overpowering the chocolate. If you prefer something more subtle start with a quarter teaspoon.
- Red gel food coloring: Gel coloring works better than liquid because it wont thin out your fudge mixture. Start with one drop and add more until you reach your desired shade.
- Crushed peppermint candies: These add both festive crunch and that familiar candy cane flavor everyone associates with winter holidays. Pulse them in a food processor for even pieces.
Instructions
- Prep your pan like a pro:
- Cut parchment paper so it overhangs all sides of your 8x8 inch pan. This little flap becomes your handle later when you need to lift the whole fudge block out in one piece.
- Melt together the base:
- Dump your white chocolate chips, condensed milk, and butter into a medium saucepan over low heat. Stir constantly and patiently until everything melts into a glossy smooth pool. This takes about five minutes and rushing it might cause the chocolate to seize.
- Add the mint and split:
- Pull the pan from heat and immediately stir in your peppermint extract. Pour roughly three quarters of this white mixture into your prepared pan, spreading it into an even layer with your spatula.
- Create the red swirl:
- Add a few drops of red gel coloring to the remaining mixture in your saucepan. Stir until its uniformly pink, then drop spoonfuls over the white layer in your pan.
- Marble like an artist:
- Run a knife or skewer through both layers without over mixing. Three or four gentle figure eights creates that beautiful swirl pattern. Sprinkle the crushed candies on top and press them gently into the surface.
- Chill until firm:
- Refrigerate for at least two hours until the fudge is completely set. When ready lift the whole block out using your parchment overhang and cut into twenty five squares.
 Pin it
 My sister now requests this fudge instead of a birthday cake every December. What started as a nervous attempt to recreate a childhood memory has turned into something my family associates with celebration. Theres something about giving someone homemade candy that feels more personal than almost any other gift.
Mastering the Marble Effect
The trick to getting those restaurant worthy swirls is working quickly while both layers are still slightly warm. If your white layer has already started to set, the red wont swirl properly and youll end up with distinct blobs instead of elegant ribbons. I keep a warm damp kitchen towel under my saucepan to maintain temperature while I work.
Temperature Matters
Room temperature fudge cuts much more cleanly than cold fudge straight from the fridge. I let mine sit on the counter for about fifteen minutes before slicing. If you notice your squares are developing ragged edges, your knife might be too warm so run it under cold water between cuts.
Storage Solutions
This fudge keeps remarkably well in the refrigerator, tightly wrapped, for up to two weeks. Between layers of parchment in an airtight container works perfectly to prevent sticking. I've also frozen portions for up to three months though the texture becomes slightly denser.
- Place wax paper between layers if youre stacking pieces in a gift box
- Serve this fudge slightly chilled so the peppermint really pops
- Cut your squares slightly larger than planned because people will want seconds
 Pin it
 There's something deeply satisfying about making candy that looks this impressive with such little effort. Maybe thats why this recipe has become my go to for anyone who claims they cant bake.
Common Recipe Questions
- → How long does peppermint fudge stay fresh?
-
When stored in an airtight container in the refrigerator, this fudge stays fresh for up to 2 weeks. The cool temperature helps maintain the creamy texture and prevents the chocolate from becoming too soft.
- → Can I make this fudge ahead of time?
-
Absolutely! This fudge actually benefits from being made 1-2 days before serving. The flavors meld together beautifully, and the texture becomes perfectly firm. Just keep it refrigerated until ready to serve.
- → What's the best way to get clean swirls?
-
Work quickly once the red coloring is added—the mixture sets fast as it cools. Use a knife or skewer to make gentle figure-eight motions, being careful not to over-swirl or the colors will muddy rather than marble.
- → Can I use different colors for other occasions?
-
Definitely! Skip the peppermint and coloring for classic white chocolate fudge, or use different colors and extracts to match any holiday or celebration theme—think pastel colors for Easter or orange for Halloween.
- → Why is my fudge too soft or won't set?
-
This usually means the mixture wasn't heated enough initially or the ratio of ingredients was off. Ensure the chocolate is completely melted and smooth before pouring. If it still won't set after 2 hours, try freezing for 30 minutes.