 Pin it
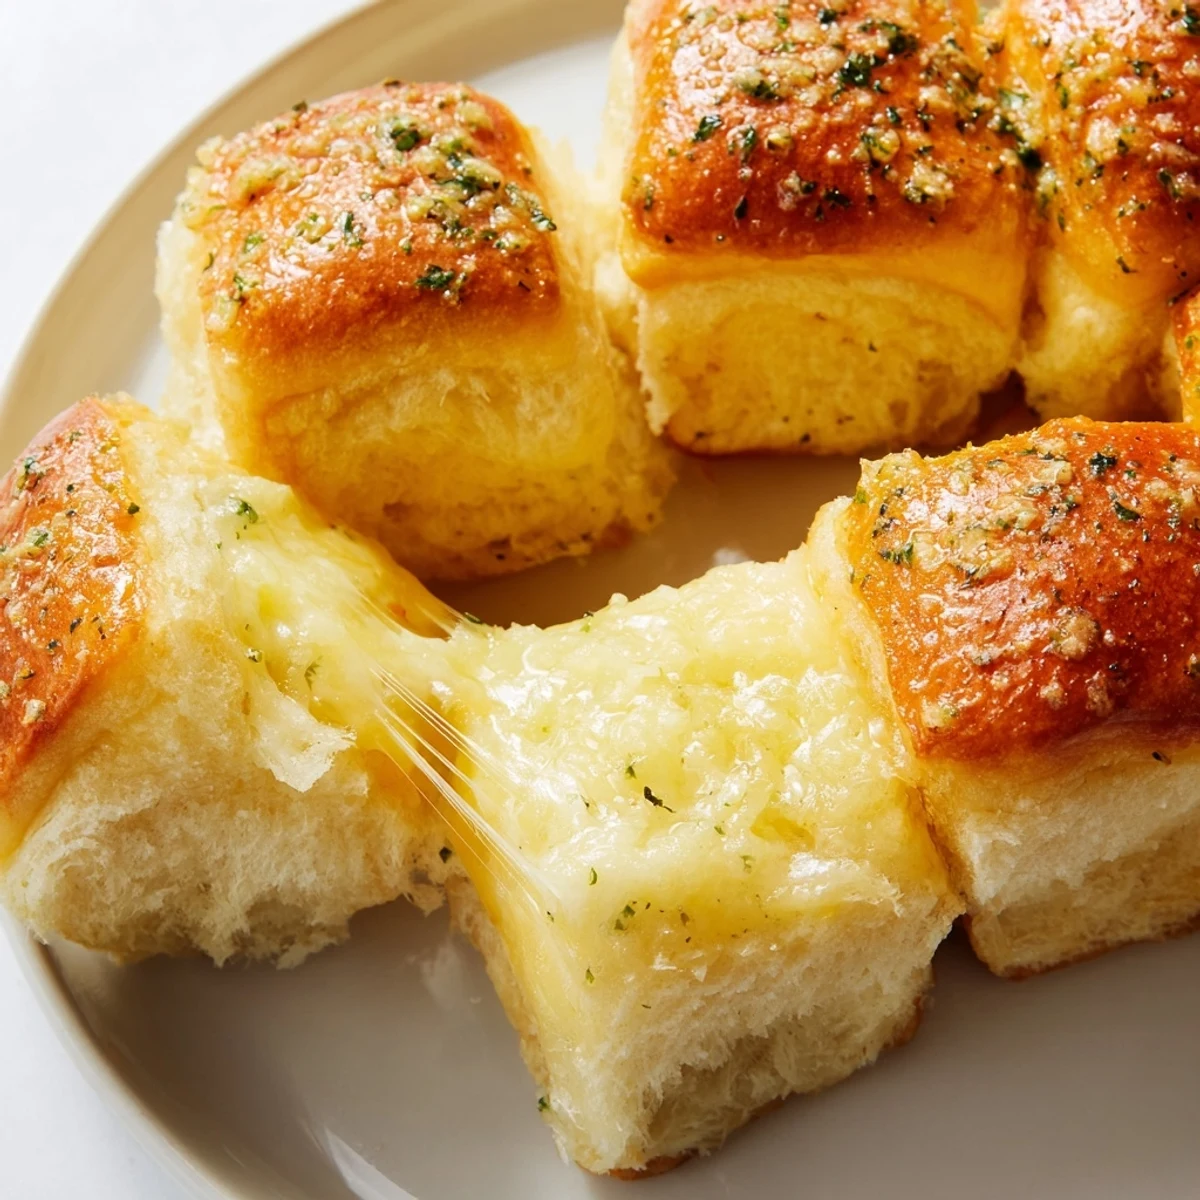
 These bite-sized Hawaiian roll sandwiches combine the natural sweetness of the rolls with sharp cheddar cheese, creating an irresistible sweet and savory combination. The whole block stays connected while baking, keeping the sandwiches intact until serving.
Brushing melted butter over the tops creates a golden crust, while optional garlic powder and parsley add extra flavor depth. The foil-covered baking ensures cheese melts completely without burning the tops.
Perfect for parties, game day, or quick snacks, these handheld treats disappear fast. The preparation is simple—slice horizontally, add cheese, and bake. Kids love the manageable size, while adults appreciate the nostalgic comfort food appeal.
The smell of sweet Hawaiian rolls toasting in butter still reminds me of that rainy Tuesday when my daughter came home from school needing comfort food. I had a package of those fluffy yellow rolls and some cheddar, so I improvised. She sat at the counter watching the cheese bubble through the oven door, and we ended up eating them standing right there in the kitchen. Now they're the first thing everyone requests for movie nights and birthday parties.
Last summer I made these for a pool party and watched my friend's husband hover near the serving tray until he'd eaten six. He kept asking what made them different from regular grilled cheese, and I had to explain it's that signature Hawaiian roll sweetness. Now he texts me whenever he's hosting people, asking if I'm bringing 'those rolls.' I've learned to always make a double batch.
Ingredients
- 1 package (12-count) Hawaiian sweet rolls: The secret is keeping them connected when you slice, they stay juicy that way
- 8 oz (225 g) cheddar cheese, sliced: Thin slices melt better and you can layer them for extra gooey pockets
- 2 tbsp (30 g) unsalted butter, melted: Brush it on generously so the tops turn that perfect golden brown
- 1 tbsp (15 g) Dijon mustard: Adds just enough tang to cut through the sweetness
- 1 tbsp (15 g) mayonnaise: Whisk this with the mustard for the most incredible spread layer
- 1 tsp garlic powder: My neighbor introduced me to this trick and now I never skip it
- 1 tsp dried parsley: Mostly for looks but it makes them feel like something from a restaurant
Instructions
- Preheat and prep your station:
- Set your oven to 350°F (175°C) and line a baking sheet with parchment paper, trust me this saves cleanup later
- Master the horizontal slice:
- Keep all those little rolls connected and slice through the entire package at once to create one top slab and one bottom
- Spread the flavor layer:
- Whisk Dijon and mayo together, then schmear it on both cut sides, it creates a barrier that keeps the rolls from getting soggy
- Pile on the cheese:
- Arrange your cheddar slices over the bottom half, overlapping slightly so every bite gets that melty goodness
- Reassemble and butter:
- Nestle the top half over your cheese layer, then paint those tops with melted butter like you mean it
- Add the finishing touches:
- Dust with garlic powder and parsley if you're feeling fancy, it's optional but makes them look impressive
- Bake with the foil trick:
- Cover loosely with foil for 10 minutes, then remove and give them 5 more minutes to turn golden and irresistible
- The waiting game:
- Let them rest for 2 minutes before slicing, otherwise that hot cheese will ooze right out
 Pin it
 My aunt started making these for Thanksgiving instead of regular dinner rolls and nobody has let her go back to the old way since. There's something about pulling apart your own little sandwich that makes people unreasonably happy. Last year my teenage cousin actually asked if we could skip the turkey and just make more of these instead.
Make It Your Own
I've discovered that adding thin tomato slices inside creates this incredible sweet and tangy situation. Cooked bacon changes the whole game, turning them from appetizer into main course territory. Sometimes I'll swap cheddar for pepper jack when I want them to disappear even faster, which somehow seems possible.
Serving Strategy
These reheat surprisingly well in a 300°F oven for about 5 minutes, though they're rare enough that leftovers aren't usually an issue. I like to set up a little dipping station with warm marinara on the side. Kids go especially wild for them when served alongside a simple tomato soup for dunking.
Party Prep Secrets
You can assemble these up to 24 hours ahead, wrap them tightly, and keep them in the refrigerator before baking. Just add a couple extra minutes to the baking time if they're cold from the fridge. I do this for brunch gatherings and it makes me look like I have my life completely together.
- Cut between the rolls with a serrated knife right after that 2 minute rest period
- Keep them warm in a 200°F oven if you're not serving immediately
- Double the recipe because you will absolutely need the extras
 Pin it
 There's something universally magical about warm bread and melted cheese that brings people together in the best way. Hope these become your go to for moments when comfort food needs to happen fast.
Common Recipe Questions
- → Can I prepare these ahead of time?
-
Yes, assemble the rolls up to 24 hours in advance, cover tightly, and refrigerate. Add the butter brushing just before baking.
- → What cheese works best?
-
Sharp cheddar provides the best flavor contrast to the sweet rolls. Provolone, Swiss, or pepper jack also work well for different flavor profiles.
- → How do I prevent the tops from burning?
-
Cover with foil for the first 10 minutes of baking. Remove foil for the final 5 minutes to achieve golden color without over-browning.
- → Can I add meat?
-
Cooked bacon, ham, or turkey slices layer perfectly between the cheese. Just ensure meats are pre-cooked since the baking time is short.
- → Why slice the whole block?
-
Keeping rolls connected during baking maintains moisture and prevents individual rolls from drying out. Cut apart after baking for easy serving.